Playstation 2 V5/V6/V7 Chip Installation Diagrams
CLICK HERE for operating
Instructions
PS2 V5/V6/V7
Chip "No Solder" Mod Chip Installation Instructions
Please make sure the
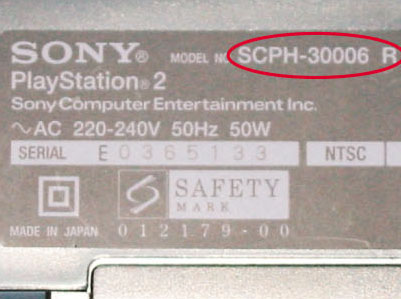
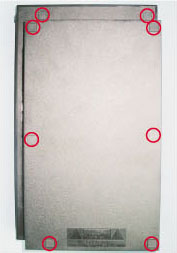
Playstation 2 Model you are modifying is a model with a model no. SCPH-3000xR,
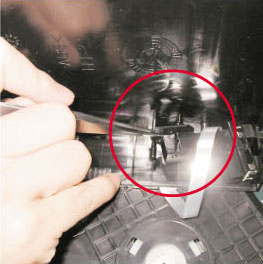
while the X can stand for different numbers (picture 1). If the model is
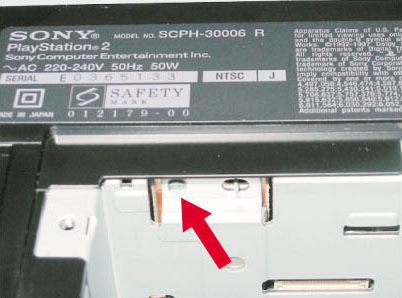
correct, please open the Expansion Bay to check if your unit has the screws like
in picture 2.
The model numbers
can be SCPH-30001 R, SCPH-35001 R, SCPH-30002 R, SCPH-30003 R, and so
on.
Whatever the model number is, it must have the
R after the model number.
V7:
If your model# is SCPH-39000, 39001, 39002, 39003, 39004 or 37000 you have a V7 PS2 main board. Witch is also compatable with this chip!
The model shown below is
used for reference only.
|
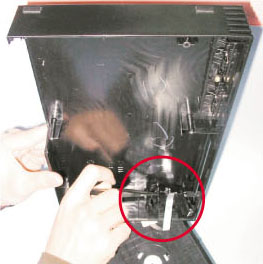
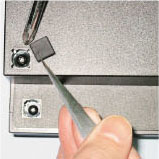
Make sure
to double check that the screw shown below is actually in your
system.
Simply take out the expansion slot cover and check to
see if the screw shown below is in your console, if it is, it is
safe to purchase this modchip as you have a V5/V6
console.
|
|
|
(1) Please prepare a
screwdriver and a tweezers (for the flat ribbon cable).
(2) Unplug the power of your PS2
console.
Turn over the PS so you can see that 8 plastic covers as
shown in the picture.
|
(3) Remove the 8 covers and unscrew
the eight screws.
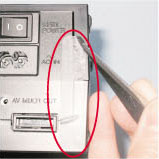
(4) If there is a sticker on your
consoles, remove it as shown below.
(5) Remove the upper part of the PS2
case now.

(6) Remove the power and eject buttons
as shown in the following illustration:
(7) Remove the screws as shown below
to remove the lower casing of the PS2 console:
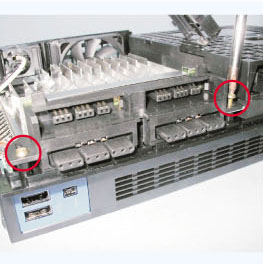
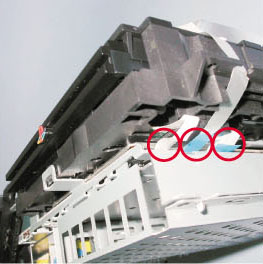
(8) At the left side, near the CD
tray, there are 3 flat ribbon cables, as shown in the first of the two following
pictures.
Unplug the left and the middle one of the three cables.
|
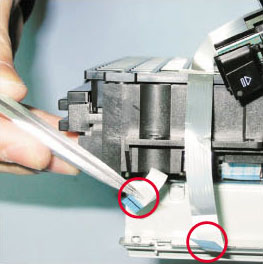
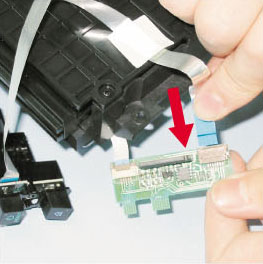
(9) Connect the two flat
cables to the PS2 R-Mod Board exactly as shown here: |
|
|
(10) Now connect the PS2 R-Mod to the
two connectors where you previously removed the two flat cables.
(11) Now Re-assemble the PS2. There
was No soldering required.