This article will show you how to automatically start any programs with administration rights when your PC starts up for windows 10.
Step 1: Create A Task Which Runs The Program You Want
First of all, you need to open Task Scheduler. To do that in Win 10 simply type Task Scheduler and click on Task Scheduler desktop app.
Next we create a new task. To create a new task, go to the Actions panel and, on the right hand side, click or tap Create Task.

When you create this task, in the the General tab, type the name of the task (remember this name, you will need it later on) and check the box which says “Run with highest privileges”. This sets the task to run with administrative permissions.
To make sure that you don’t have any compatibility issues, go to the “Configure for” drop-down box, at the bottom of the Create Task window. Select Windows 10 or whatever operating system your using (7, 8, 8.1).

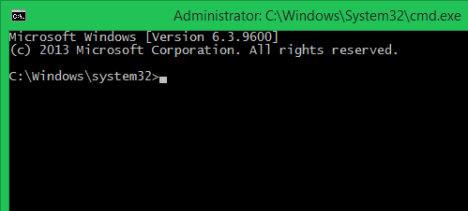
In the Actions tab, create the action that launches the program. The drill is simple here: click New, select the action “Start a program”, specify the path to the program that will be executed and click OK. For this article we took as an example the Command Prompt, as shown below.

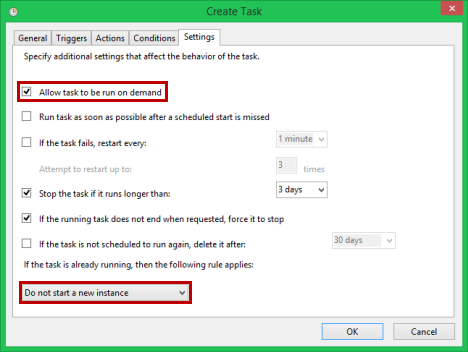
Your last stop is the Settings tab. Here you have to make sure that the “Allow task to be run on demand” checkbox is selected. Also, make sure that, when the task is already running, another instance won’t be started, by selecting the “Do not start a new instance” option.
Click OK and you are done. You just created a task that launches the program that you want to use.
Now, to make sure that your task works, take it for a test. Go to the Task Scheduler Library, right-click the task that you just created and press Run.

Did the program you specified launch? If it did, you are done. If it did not… well… start over. 🙂
In my case, the test ran without any problems and, as a result, the Command Prompt was launched with administrative permissions.
Step 2: Create A Shortcut To The Newly Created Task
The second step is to create a shortcut that launches the task that you created. That, in turn, runs the program you selected without a UAC prompt being displayed. Sounds complicated, I know. Fortunately it is not that hard. You’ll see!
The fastest way to create a shortcut is to right-click on the Desktop. From the menu that appears, choose “New -> Shortcut”.
An important difference when creating a shortcut to a task vs. a normal shortcut is that you need to type schtasks /run /tn "Task Name" in the “Type the location of the item” field. Task Name needs to be replaced with the actual name of the task. Remember earlier I said (remember this name, you will need it later on) well now we need to use it 🙂 In this command, the parameter /run simply runs a specified task while /tnallows you to type the name of the task that you want to run.

Once the shortcut is created, if you double-click on it, it will run the task that you created and it will launch the program you specified with administrative permissions but without the UAC prompt showing up.
NOTE: If you want to change the icon of the shortcut that you just created, follow the instructions.
To change the icon to something else, right-click on your new shortcut and choose Properties. On the Shortcut tab, click Change icon.
Step 3: Create A Start Up Registry Key To Start Your Task
To make a registry key lets start by typing run in the search box then in the run dialog type regedit and click ok. Once the registry editor opens navigate to HKEY_CURRENT_USER\SOFTWARE\Microsoft\Windows\CurrentVersion\Run Once there in the right field your going to right click and select New > String Value. Now give your string a name. You can name it whatever you want. Next right click on the shortcut you created earlier and click on properties then under the shortcut tab where is says target copy the address. Now go back to your registry editor and right click on your newly created string and select modify and paste the address from your shortcut into the Value data area. That’s it your done!!
Conclusion
I tried all sorts of things to get my program to start automatically with admin rights. Short of disabling UAC this is what worked for me. I would have been fine with disabling UAC but it seems in Windows 10 some things won’t even work if you do this. For example the new Edge browser will not let you use it if UAC is off. That alone was enough for me to come up with this method as who knows what else may not work if you completely turn off UAC.
Please note parts of this guide came from 7tutorials.com to save me time.